
TUTORIALS • TECHNIQUES
The Living Line: Pen & Ink Drawing from Life
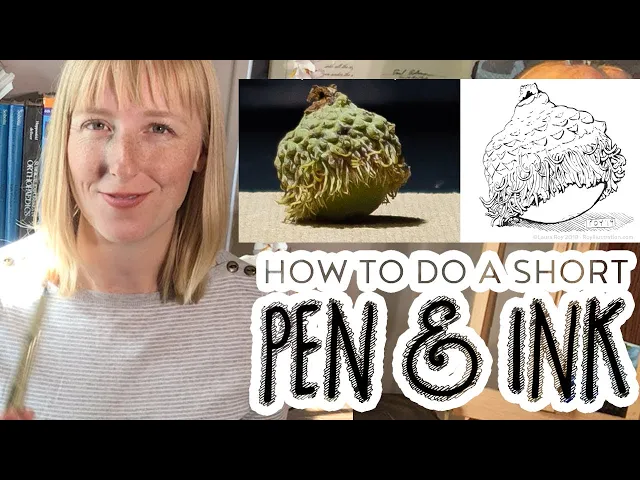
There is no "Command-Z" in traditional pen and ink. Mastering this medium forces an absolute commitment to contour, line weight, and structural planar analysis. Whether I am rendering a complex botanical cross-section or a simple bur oak acorn, the underlying discipline remains exactly the same.
In this tutorial, we will walk through the studio workflow for drawing directly from life—from the initial pencil architecture to the final ink rendering.
The Studio Toolbox
Here are the exact supplies I rely on for traditional inking.
A note on transparency: The Amazon links provided below are affiliate links. If you purchase through these links, I receive a small commission at no extra cost to you, which helps support the studio!
Paper & Surfaces:
Mixed Media Sketchbook: Canson XL Mixed Media 9"x12"
Bristol Pad: Strathmore 300 Series Bristol Smooth Pad, 11"x14"
Small Drawing Board or clipboard.
Ink & Nibs:
Ink: Higgins Black Magic or a similar waterproof India ink.
Nib Holders: My absolute favorite is the Tachikawa Holder. Another great starter option is a Comic Pen Set.
Nibs: A range of flexible and tighter nibs is ideal. Zebra and Tachikawa both make excellent nibs. I generally use these two:
Maru Mapping Nib (for tighter, finer, rigid lines)
Hunt 99 (for variable, expressive line weight)
Drafting Tools:
Technical Pens: Micron Pens (Sizes 01, 03, 05 depending on your preference for waterproof finelining).
Erasers: White plastic erasers (Tombow, Staedtler, or Pro Art).
Pencil: HB Wooden Pencil for the initial underdrawing.
Tape: 1/2" Artist Tape to secure your paper.
Optional: Lamy Fountain Pen (Charcoal) with a fine tip for sketching on the go.
Step 1:
Curate the Subject
Find physical subject matter with interesting textures and clear geometric forms.
Step 1:
Curate the Subject
Find physical subject matter with interesting textures and clear geometric forms.
Step 2:
The Studio Setup
Organize your nibs, ink, and paper before you begin. (See my exact supply list below).
Step 2:
The Studio Setup
Organize your nibs, ink, and paper before you begin. (See my exact supply list below).
Step 3:
The Gestural Limit
If you are executing a quick study, set a timer. This prevents over-rendering and forces you to capture the essential architecture quickly.
Step 3:
The Gestural Limit
If you are executing a quick study, set a timer. This prevents over-rendering and forces you to capture the essential architecture quickly.
Step 4:
The Pencil Architecture
Lay down a very light, structural pencil drawing to map your proportions.
Step 4:
The Pencil Architecture
Lay down a very light, structural pencil drawing to map your proportions.
Step 5:
Commit to Ink
Execute your linework. Be intentional with your hatching and line weight to suggest shadow and form.
Step 5:
Commit to Ink
Execute your linework. Be intentional with your hatching and line weight to suggest shadow and form.
Step 6:
The Final Reveal
Wait until the ink is completely, 100% bone-dry, then use a plastic eraser to remove the underlying pencil scaffolding.
Step 6:
The Final Reveal
Wait until the ink is completely, 100% bone-dry, then use a plastic eraser to remove the underlying pencil scaffolding.
Studio Pro Tip
Try a Nib!
Studio Pro-Tip: While fineliners are great for technical consistency, nothing replaces the traditional dip pen. The variable pressure of a metal nib creates a "living" complexity and variation in your line weight that is nearly impossible to replicate with a static marker.
That sums things up for now!
I hope this inspires you to pick up a dip pen, step away from the screen, and start inking. If you do, please share what you create! Tag me on Instagram (@Laura.roy.art) so I can see your work.
Supplement:
Watch the Process
Want to see this workflow in action? In the video below, I walk through a time-lapse and full-length breakdown of this exact process, rendering a bur oak acorn from life.
Supplement:
Watch the Process
Want to see this workflow in action? In the video below, I walk through a time-lapse and full-length breakdown of this exact process, rendering a bur oak acorn from life.
Did you find this helpful? Do you have any of your own tips you'd like to share? I'd love to hear about it if you decide to try something new. If you use it differently, I'd love to hear that, too!

-Laura
Did you find this helpful? Do you have any of your own tips you'd like to share? I'd love to hear about it if you decide to try something new. If you use it differently, I'd love to hear that, too!
-Laura
© 2026 Laura Roy. All rights reserved.
© 2026 Laura Roy. All rights reserved.